Meet-up.com is a bit of blessing here in Tokyo. I found the Stitch n Bitch group there, the Werewolf people (have I mentioned that before?), the Asakusabashi craft group and now the Onigiri girls who had a chance to make a Yukata listed as a meeting.
This post from February describes various traditional japanese clothes and a Yukata is one of them. Last week we met our teacher, a wonderful 84 year old, and the organiser who was also translator, and went to a traditional fabric wholesaler as a group. Photos weren't allowed (boo) but this is what I came away with.
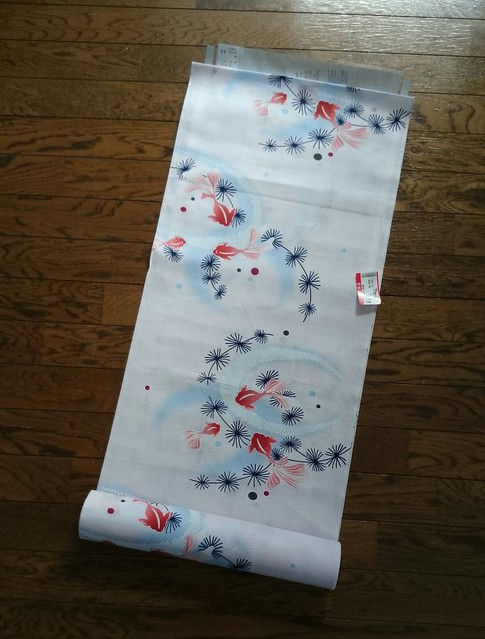
You have to buy a whole roll which is 12m long, and they are generally a fixed width with men's designs a bit wider and children's designs a bit narrower. You use the whole roll in your Yukata regardless of your height although seams and sleeve lengths can vary and any extra length is tucked in under the Obi (belt) you wear with it. The rolls aren't cheap - mine was a mid-range one and came in at £35 but they went a lot higher than that and this is simply starched cotton. You can start to get an idea of what just the fabric for an embroidered silk kimono might cost.
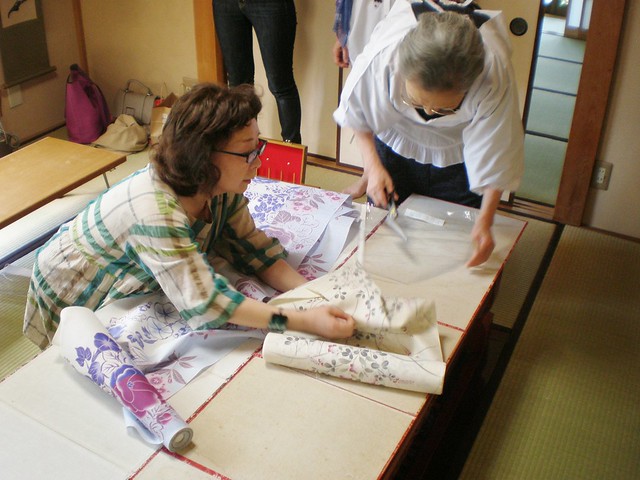
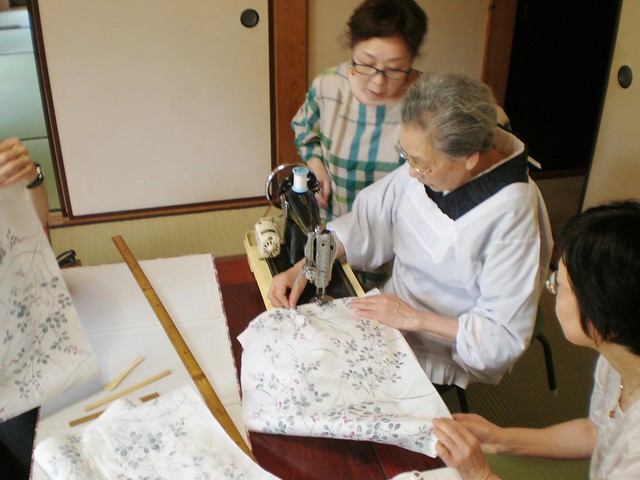
Today's class was cutting out and starting to sew and because we only have three sessions there were lots of the Teacher's former pupils and now friends to help out. This is a skilled art form! Patterns need to match with as little waste as possible and apart from height everything else about the person's size is done by eye. It was very impressive.
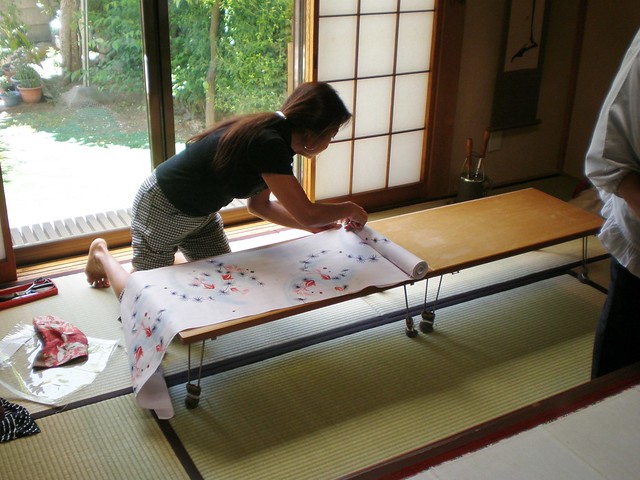
The white mats you can see on the table are vintage cutting mats - "vintage" in that the Teacher got them as new 50 years ago.
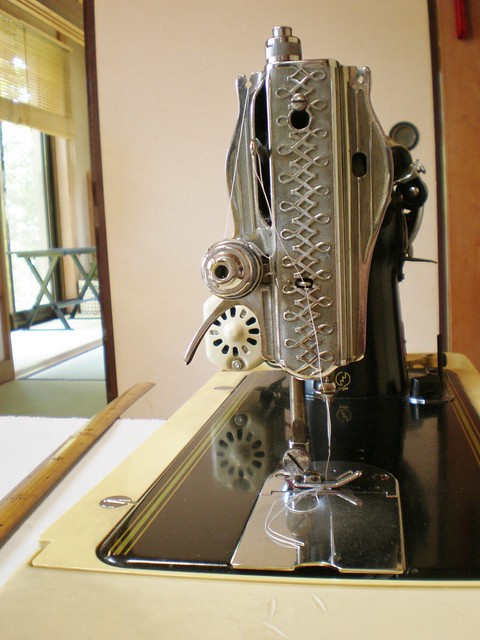
They fold up and are covered with woven brocade. They are the perfect size for cutting out Yukata and Kimono. They were only the start of the specialised tools I saw. One particular beauty was this sewing machine which again she had had since new.
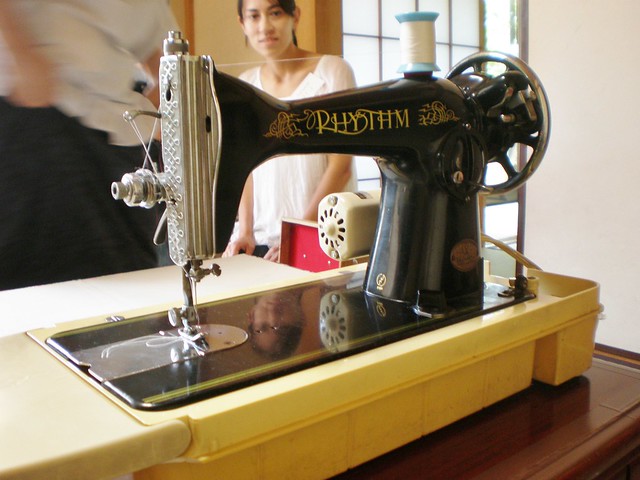
It was a wedding present and had apparently never broken down. Just divine detailing and perfect stitching.
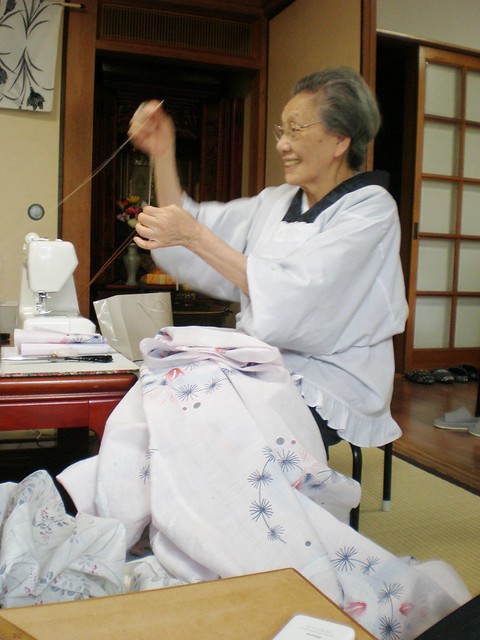
I think she was a bit surprised about how excited I got about the various notions but also rather pleased too. The other two at this lesson had only really sewn in school whereas I was able to give her the english names for things like tacking, types of seams and so on. Here she is ironing one of those seams. I had never seen an iron like this. A close up:
Apparently sewing schools in Japan still use ones like this and it was very nifty - more like a small plasterer's trowel than a modern iron.
While the machine was used to join lengths of fabric, the seams and hems are all hand sewn. The hand sewing used a cotton thread the weight of lace weight wool - perhaps a light pearl cotton - and a fairly hefty needle so was quite tough on the fingertips. We used two stitches I'll go into another time, but I'd not come across either before. We have been given homework to do before the next lesson in two weeks time but the Teacher helped by tacking the armhole seams in place.
Such a dude. Incidentally the white smock she is wearing over her Kimono is what she described as 'mother's uniform' - a traditional apron for wearing over a Kimono and specifically to help keep the dangling sleeves out of sinks, pots etc. It tied at the back and was clearly one of her own creations.
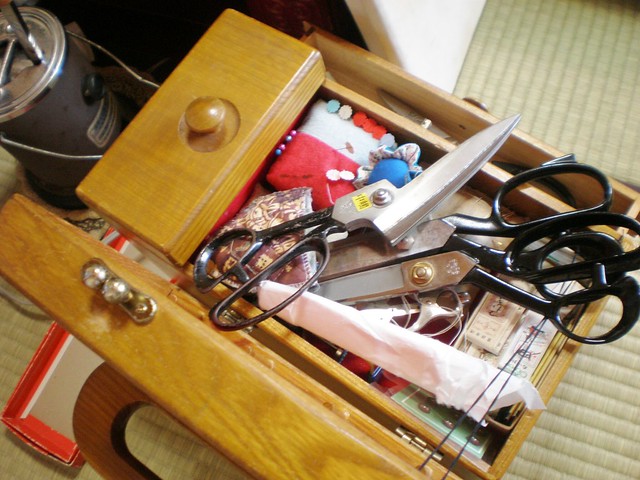
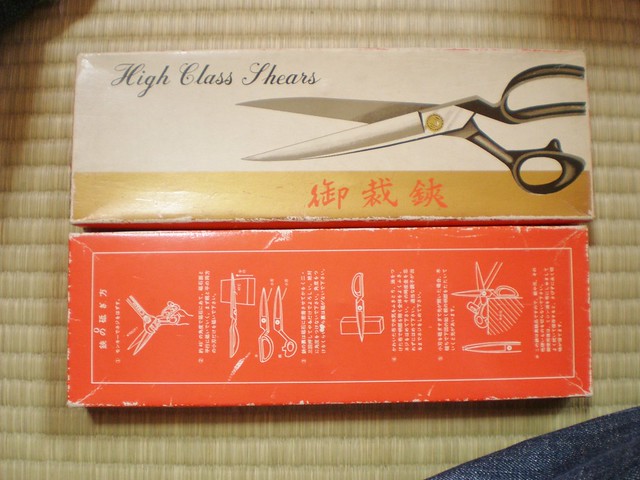
As well as impressive cast steel scissors there were these mighty shears.
And of course she still had the beautiful box for one of the pairs.
Everything about her was high class. I'm a big fan of that Teacher already.
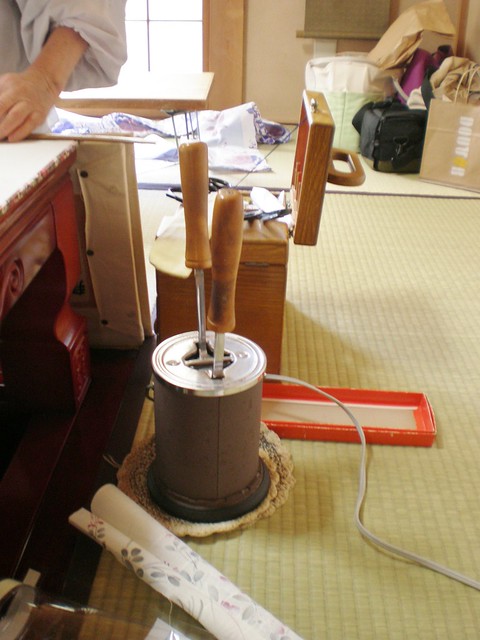
The final notion I wanted to show you was one a TV crew had apparently come to film her using because it is only used in this kind of work.
You knelt or sat on the bottom bar and a collapsible arm came up at right angles with a cord attached with a clamp on the other end. The clamp in itself was beautiful and had little cork pads were it gripped the fabric. You could then use it to hold the fabric taught as you folded the seam and finger-pressed it. The fabric was quite heavily starched so this gave you a crisp line. I'd certainly never seen anything like this before so let me know if you have and in what context.
It will be perhaps another month before the Yukata is finished but once it is we are all going to go on a little outing somewhere and take photos of each other. Wheeee!


3 comments:
Can't wait to see the photos!!
Thanks for commenting on my blog, Lixie! Your email address is not associated with your profile, so I couldn't reply to your comment directly. This is so interesting about the fixed width fabric. I hope your robe comes out good. I went to the February posting to read about the different garments. VERY interesting!
Hello
I have a modest collection of ten or so machines here in Sweden and Its amazing how machines that once was entirely meanically powered got electrified and put in boxes instead of tables, in this case a machine from around 1900 mounted in a horrible PLASTIC box. The machines from this period and onwards to the 1980's were just like the cars - made twithout a planned obsolence. Today every product has a planned date for destruction and en also the spareparts are no longer available. Old machinery, if given a little grease now and then, can last for ever..
Post a Comment