Wednesday 20 May 2015

How to Dissect a Shirt to Reuse the Fabric

I have been planning a quilt using blue shirt fabric from thrifted men's shirts. I love the softness of the often well-worn 100% cotton shirts. I have also seen them used in memorial quilts - made from the clothes of a loved one who has passed away.

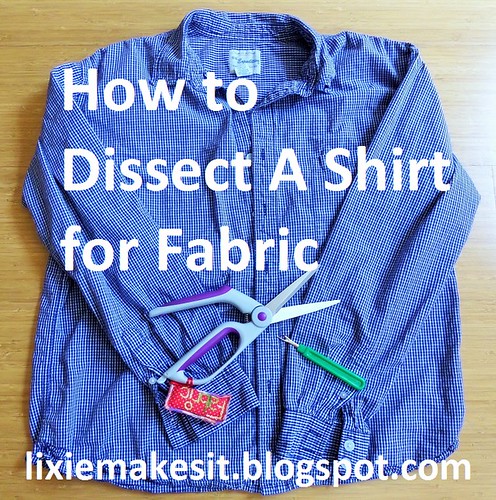
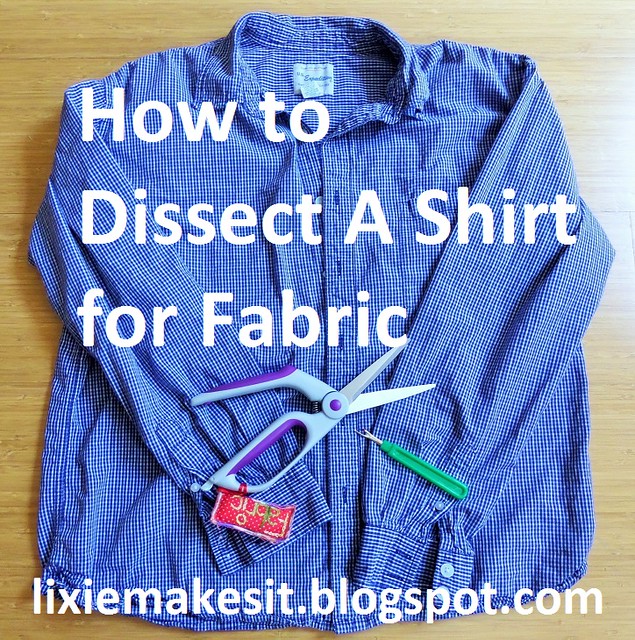
Since I have been doing this with a series of shirts I thought I'd write a tutorial on the dissection process.
How to Dissect and Shirt for Fabric Tutorial

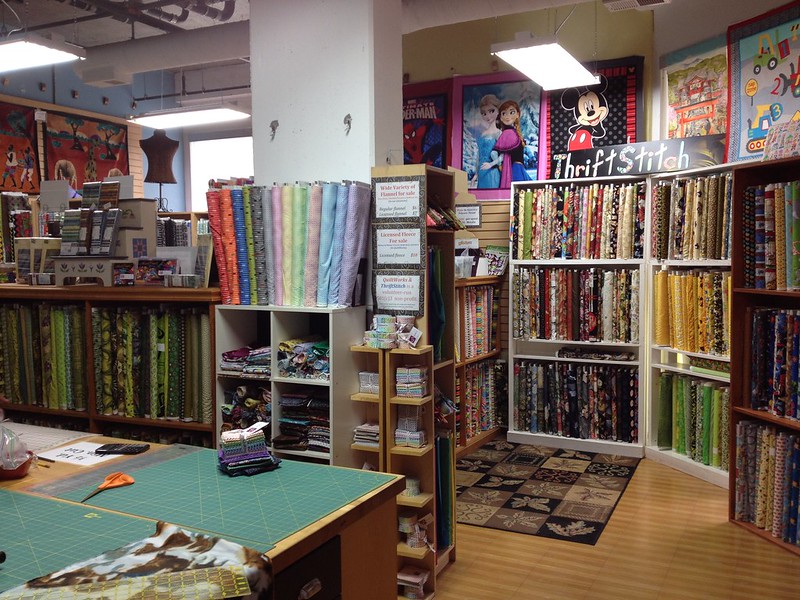
First, a word on choosing your shirts. I am lucky because San Francisco has a number of cheap thrift stores so shirts can be easily had for $2-3, sometimes just 99 cents! My favourite thrift shop - Thrift Town - even has sales and daily discounts as well as a loyalty scheme! When faced with a selection of shirts...

  • Make a beeline for the end of the display that has the long sleeved shirts in the largest sizes - a 3X shirt is going to give you more fabric than a XS.  
  • Once you find a shirt you like the look of pull it clear of the rack and check the label to see what it is made of. You might be fine with a cotton/poly mix but usually for quilts you want 100% cotton. 
  • Now check the armpits and front for staining. If the front has stains on you may want to just put it back straight away and move on. If it's one small stain and you really like the fabric then check the rest of the shirt for marks and as long as it is OK add it to your basket. Surprised I'm not telling you to check the collar and cuffs? We will be discarding them all together so don't worry about them - although if they are really nasty it's a good sign that you need to thoroughly check the rest for stains. 
  • Next move on through the smaller sizes. If your thrift shop has separated them and you see a short-sleeved shirt you really like then go through the same process with them - but remember that short sleeves will give you roughly a FQ less fabric than long sleeves. 

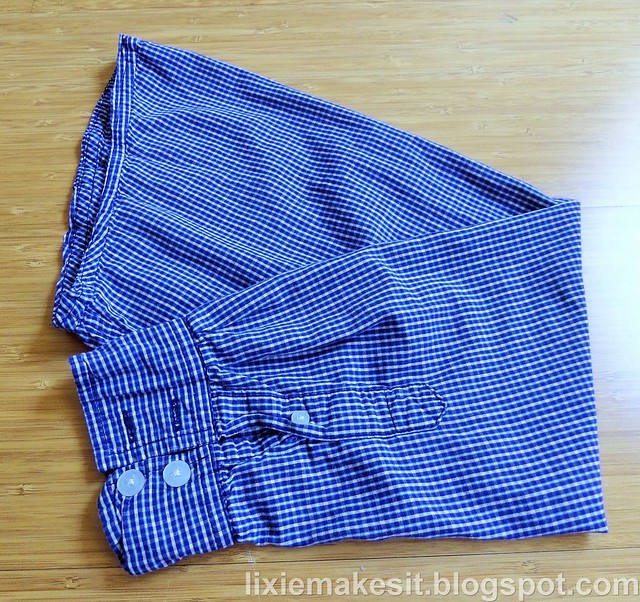
When you get home, start off with giving the shirts a good wash with your usual detergent. Once they are dry it is up to you whether you want to iron them or not. I tend not to as the flat pieces of fabric are much easier to iron once you have them chopped up. Now we're ready to start!

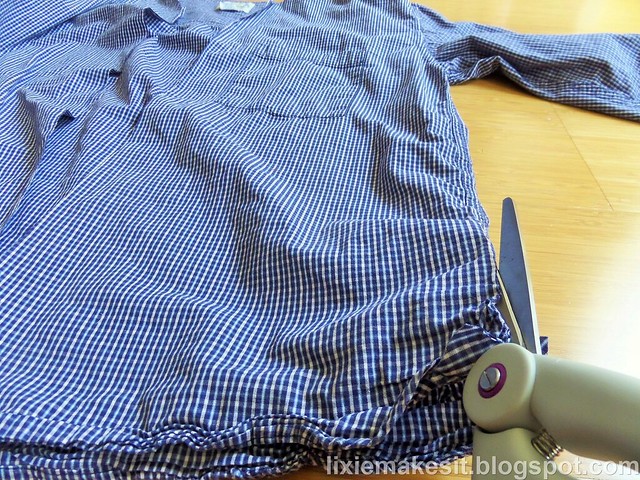
  • Lay your shirt out face up and hold your scissors firmly. Mine are spring-loaded so they open automatically. So much easier! Starting to the right of the button band, cut just to the right of the seam. 
SAM_3647
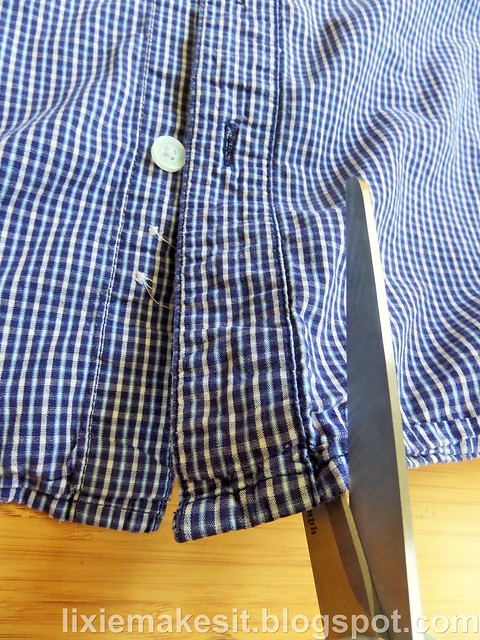
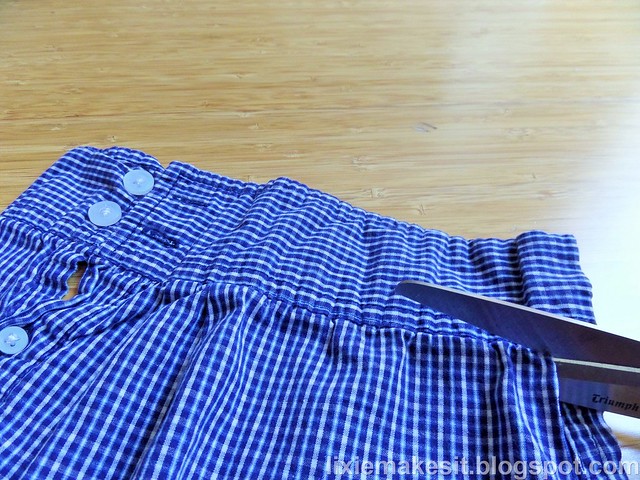
  • Keep cutting along this line until you reach the collar. Just before the first seam of the collar change direction and cut around this line.    
SAM_3648
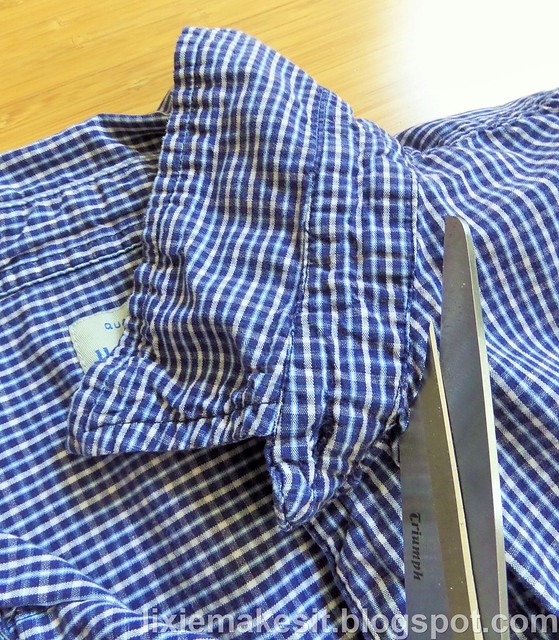
  • Once you have cut around the base of the collar you will find yourself on the button side of the button band. Change direction again and cut down alongside the seam of the button band. 
SAM_3650
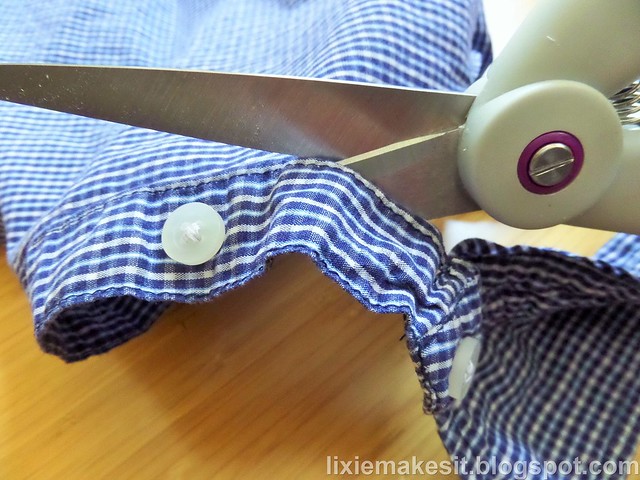
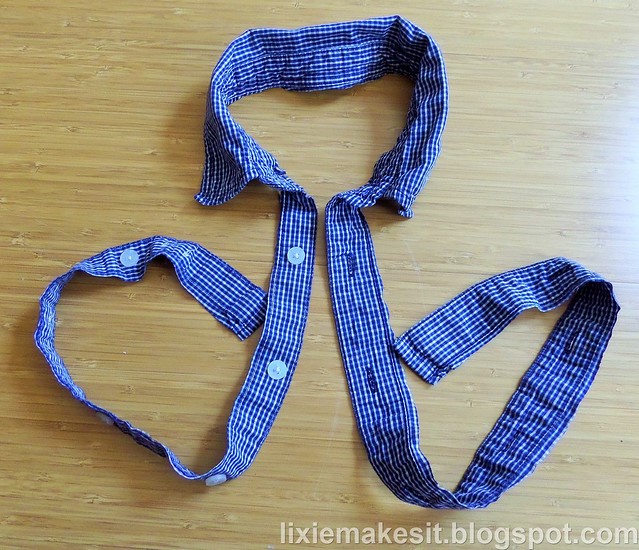
  • This will leave you with some of your first scraps to throw away or reuse as stuffing. As a button addict I can't let myself throw away buttons, even very plain white ones, so I use a seam ripper to take them all off. 
SAM_3651
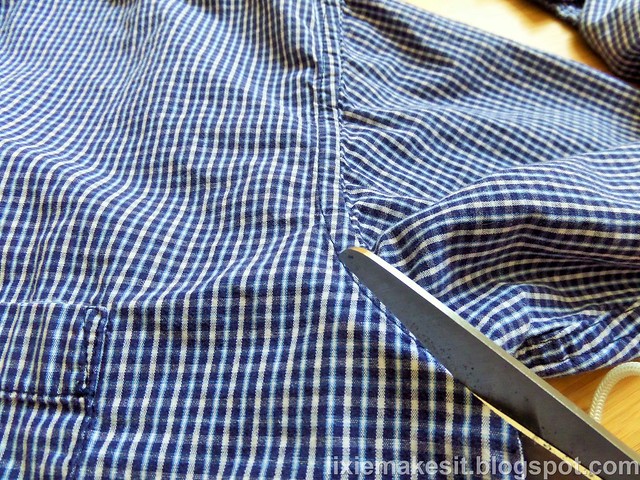
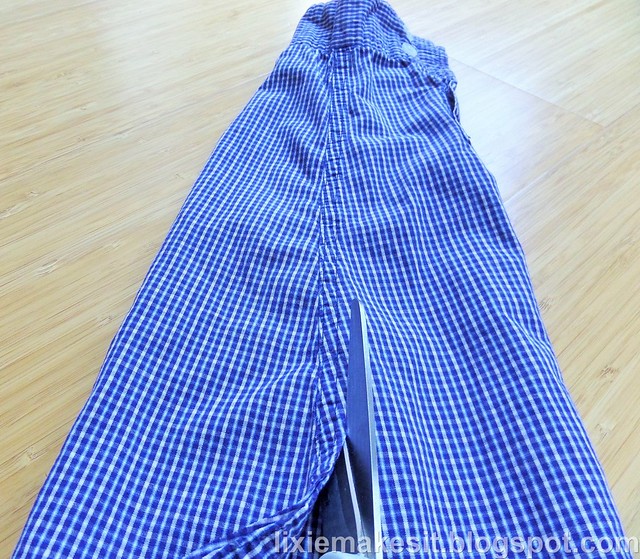
  • Now move to the right side of the shirt and find the side seam. Start cutting just to the left of the seam. 
SAM_3653
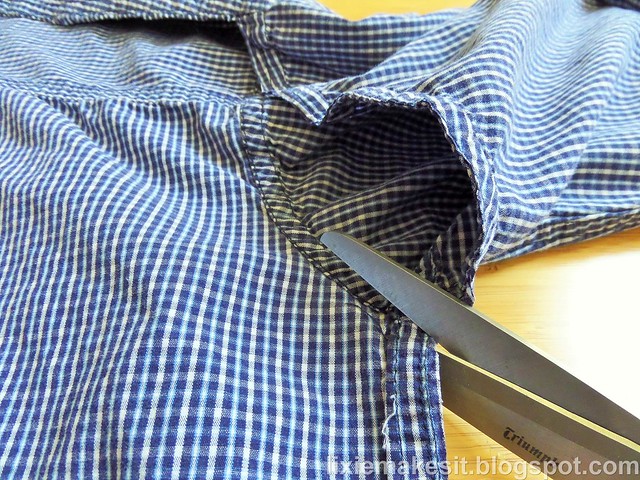
  • When you reach the armhole, as with the collar, change direction and cut to the left of the armhole seam. If your armhole has staining, you should cut around it now. 
SAM_3655
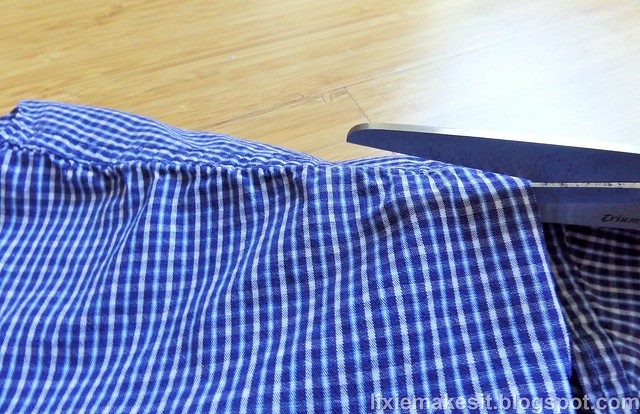
  • When you get to the shoulder seam change direction again and cut just below it until you reach the neck. 
SAM_3656
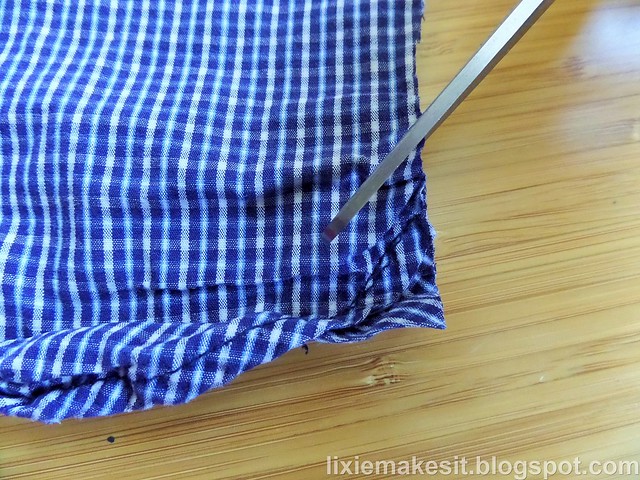
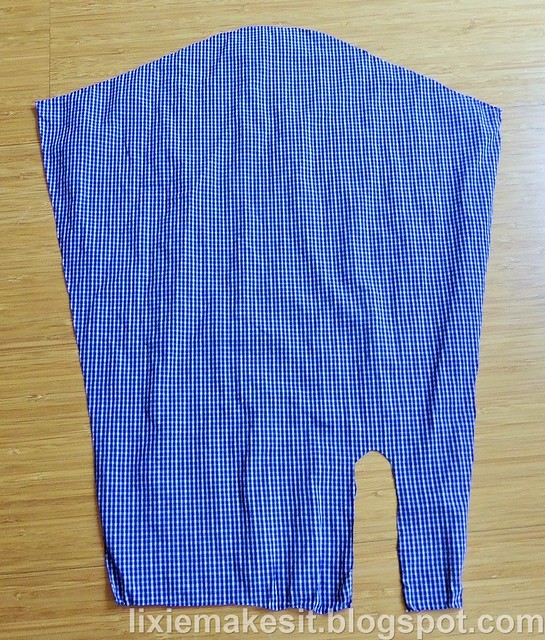
  • You have almost finished your first piece but first there is that bottom seam. My shirt had some shaping to round the bottom of the shirt where the front and back join together. I cut around this. Other shirts may have straight bottom edges. 
SAM_3658
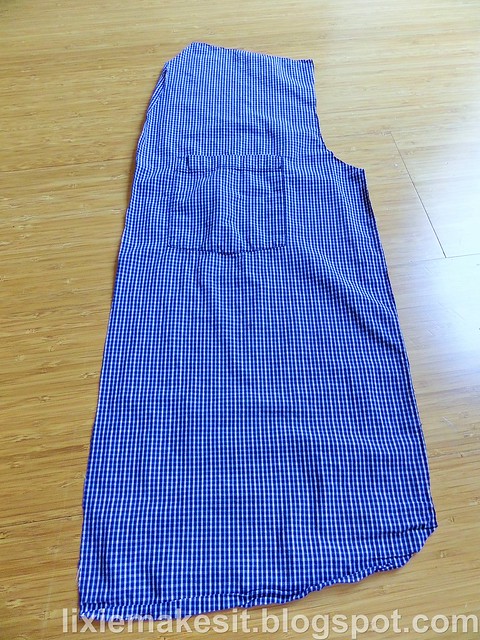
  • Once that bottom seam is off you have your first piece! You'll notice that I've left the pocket in place. I've seen a number of quilts - especially memory ones - that leave the pockets on as a feature. I rather like this idea so I've left mine but you can always unpick or cut around them if you have one on your shirt.  
SAM_3660
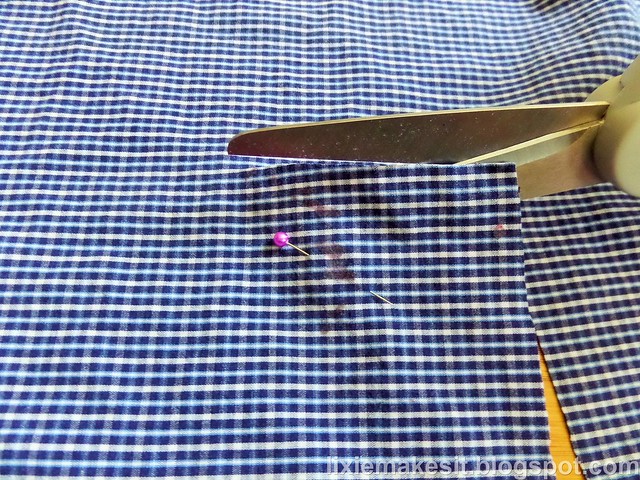
  • You can now repeat the steps above for the left front. On my shirt there was a small oil mark on this side so I marked that with a pin to make sure I didn't forget about it. 
SAM_3673
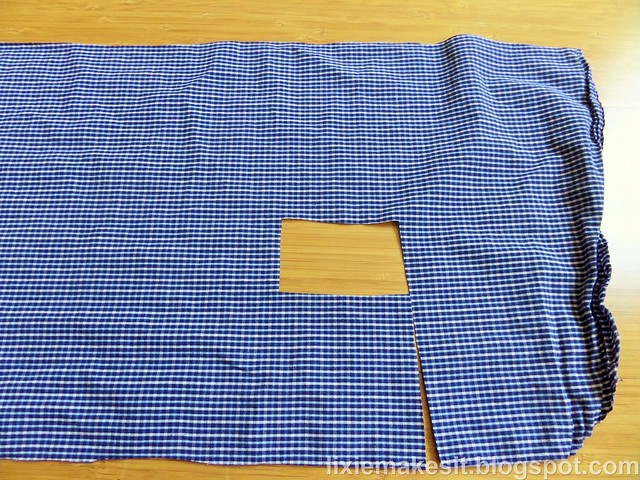
  • I cut it out leaving me with a small hole towards the bottom. 
SAM_3674
  • With both fronts dealt with return to the rest of the shirt and finish removing that right sleeve, continuing to cut to the left of the seam. 
SAM_3662

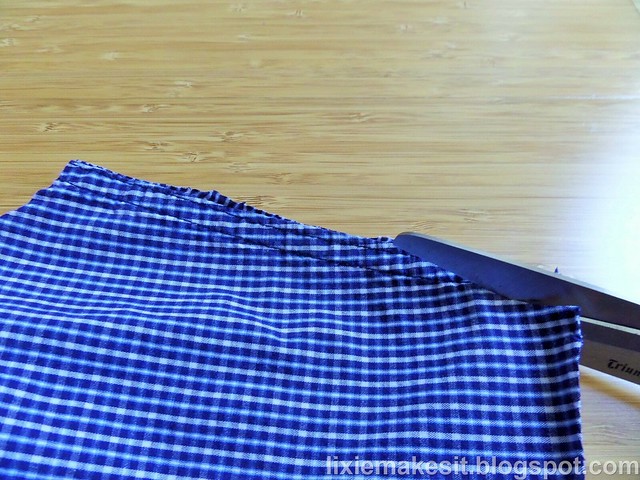
  • That will leave you with a complete sleeve and your first step is to tackle that seam around the top end. 
SAM_3663
  • Cut the seam off just to the right os the stitching. Once that is done start cutting to the right of the sleeve seam, all the way down to the cuff. You are going to throw the cuff away (they are usually very worn, as is the collar) so you can cut straight through it. 
SAM_3666
  • Cut down the side of the seam still attached and discard that. Next cut straight across the cuff and discard that too. 
SAM_3669
  • You can also cut around the cuff placket and discard that, saving the button. You may choose to keep it and sew it up to provide a more continuous length of fabric, using it as a design feature.
SAM_3671
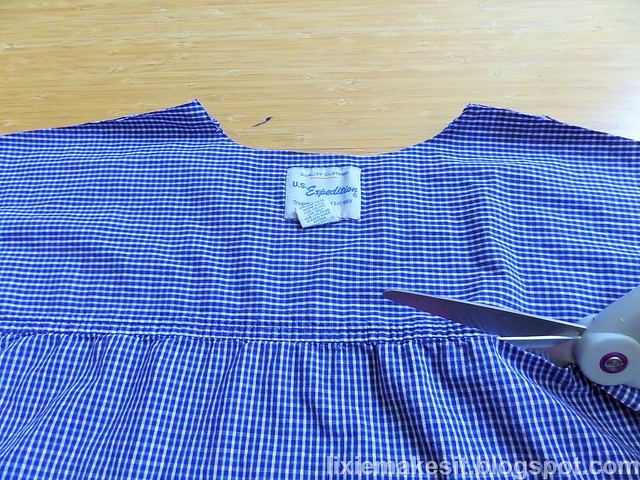
  • The final piece to tackle is the back. The shoulder seams need removing, cutting just underneath them. 
SAM_3677
  • In some shirts the back piece is divided into a top and bottom section with the top being a double thickness. While this reduces the overall size of the back piece it results in an extra piece of fabric. Some shirts may have a pleat or several pleats in the lower of the back pieces, where it joins the top piece. If your shirt is like mine and has this divide in the back pieces, cut just underneath the seam, all the way across and across any pleats that might be there. 
SAM_3680
  • Cut just above the seam of this top section - it may feel like you are cutting through extra layers of fabric but don't worry about this. This will result in two separable pieces of fabric. 
SAM_3682
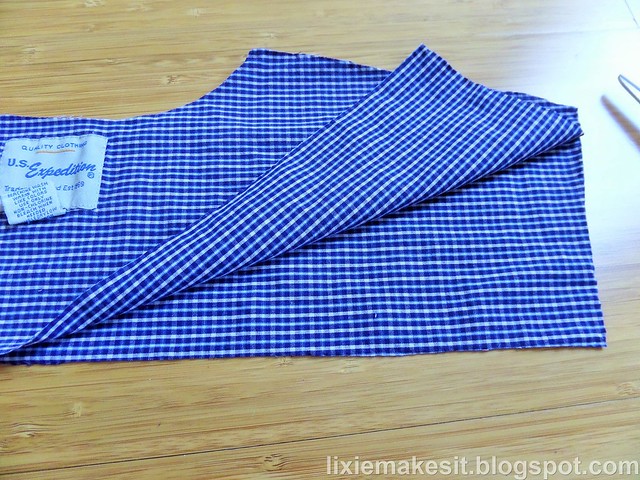
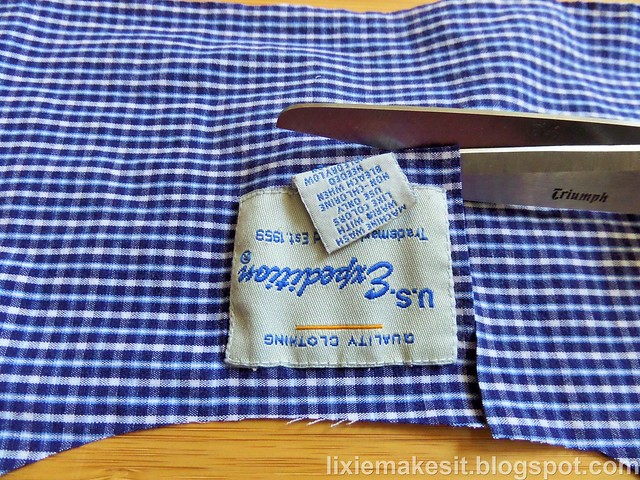
  • In a well made or older shirt you may need to pull away some seam allowance from between the two pieces - you can discard this. In my shirt there wasn't enough seam allowance to show so I just gave it a shake and few wisps fell out. One of the pieces may have a label attached. You could unpick this, or leave it there, but I tend to cut them out and keep them as a guide to which fabric comes from which shirt manufacturer. 
SAM_3683
  • This will leave you with just the bottom section of the back of the shirt which should now just need the bottom hem removing. If there were pleats then it is possible you may have a small seam to unpick in the centre of each pleat. 
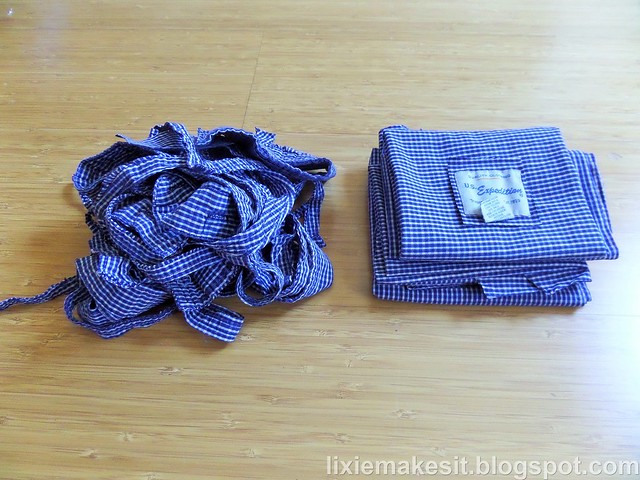
  • And there you go! You should now have a pile of fabric sections and a pile of scrap.
SAM_3686

I hope you find this useful! Feel free to add it to Pinterest if you think you might need it in the future. 
How to Dissect and Shirt for Fabric Tutorial

Monday 18 May 2015

My First Maker Faire

My first (but definitely not my last) Maker Faire took place last weekend in San Mateo - about half an hour's ride on the double-decker Caltrain south of San Francisco.
Caltrain
I don't think any of my photos do justice to the scale of the event - it was epic, covering several football fields, with huge indoor arenas like aircraft sheds and thousands of people of all ages darting hither and thither. I had volunteered for a five hour shift in the middle of the day (which I spent in the Media Lounge answering important media enquiries like "Where are the toilets?") but for the rest of the time I was out there talking to Makers. The full 59 photos can be seen on Flickr here so these are just the edited highlights.

There was an excellent mix of big name and kitchen table set-ups exhibiting and interacting with people. Google had a big presence and either they or Intel had things like this set up.
Robotic knife game
It's a robotic version of that pub trick where you stab a knife quickly in the spaces between your fingers and not into the fingers themselves. The gore-laden additional fingers lying in the bottom of the container were a nice touch. Then again there were the people who were creating for fun's sake. This guy had turned a deck chair and brolly into a moterized conveyance and was happily touring the site at impressive speed.
Mechanised sun lounger
That wasn't the only motorised vehicle.
Motorised Cupcake
And then...
Steampunk Woman in motorised wheelchair

Different zones focussed on different types of Making. 3-d printing had a big presence as did wearable LEDs and other light forms. Lego was well represented as was laser cutting and kickstarter type start ups such as - god bless america - a way to turn inanimate objects into musical instruments.
Musical Food
In the video monitor you can see jelly being demonstrated and they had some bananas and some fake grass which people could try out on their stand.

Those people who remember when MAKE magazine started (ten years ago) will also remember it had a sister publication called CRAFT. Sadly that seems to have died a death but there was still some 'craft' going on. Machine knitting of course.
Knitting Machines
Plus a delightful...
Needle Arts Zone Sign
I also now know even more than I did before about making clothes from duct tape.
Duct Tape Crafts
And I already knew a fair amount having made three tailor's dummies for three of the SkipNorth attendees.

There were also several fire blowing beasties, including this huge guy who had a woman standing inside him making his bits move and flame.
Giant Metal Man
There was also a giant metal flaming snail on wheels. One of the zones was kept dark to make the most of the illuminated Makers.
Inflatable Illuminations and Makerbot
That is an inflatable forest. As if you didn't know.

The whole thing was quite incredible and there are lots more photos online from me and others. Their official website shows there are events happening world wide and I would strongly recommend you go and take the whole family. At this one there were special kid zones and the only times I heard crying was when kids were being told they had to move on to another Zone.


Saturday 16 May 2015

My First Portrait

This week marked 11 years since Pooch and I first met. Last year's present was the EPP Death Star. This year I wanted to see if I could top that. Pooch has always said his likeness should be captured and given to the Nation so I decided on a portrait. Here is how it came out:
Pooch Portrait in Fabric

I had been thinking about portraits in fabric since seeing this quilt in Yokohama last year.
Detail from Duck Face by Hiroko and Masanobu Miyama
Man, that was a good quilt show. All the photos are here. I knew I wouldn't be producing anything like the little girl but I thought I could try the technique out and make it my own. I started with a favourite photo of mine of Pooch in Tokyo, eagerly awaiting the arrival of a bowl of Ramen.
Process to create the Pooch Portrait
There were several steps I took in going from photo to portrait so I've captured them in the photo above and labelled them 1-5.

1. I opened the photo in an editing program (just the one installed on my windows laptop), cropped it to just the face and changed it from colour to black and white. I also played around with the light levels to make it clearer where the lightest and darkest places of the image were.

2. Using my portable lightbox (i.e. the window on a bright day) I traced the outline of the face and features and where, through the top sheet of paper, it appeared that the tones of grey changed. Laying the original and the tracing side-by-side I then added a few extra lines here and there to complete it. I photocopied this to give me the sheet to use for the next part.
Pooch Portrait in Fabric
3. This stage happened in two parts. First I spent a bit of time studying my black and white print out and decided which of my areas were the same shade of grey and which were lightest, light, dark, darkest and so on. I also decided to use one colour family for the skin, another for the hair and a third for the glasses. For the skin I ended up with S1 for the lightest part of skin, S2 for the next lightest and so on. Hair was H1 etc and the glasses were one colour so I left it at that. I then photocopied my labelled drawing onto a piece of freezer paper - that stuff with wax on one side that you can use for applique. I then went back to my original and coloured in all of the S1 shapes the same colour. I proceeded to do the same with S2, H1 etc so I now had a visual guide to what was what.

4. I had my freezer paper and now it was time to cut out what would become a huge jigsaw with some very tiny pieces. I cut out all the pieces and put them in small plastic bags - like the ones you use for jewellery findings - so that they couldn't blow away. All the S1's went in one bag, S2's in another etc. It was only at this point that I chose the fabric! Greens for skin, blue for hair, brown for glasses and a perfect equation print for the background. Looking at the plastic bags I judged how much fabric I needed for each of H1, H2 etc. In most cases it was only a postcard or less of each. I cut some bondaweb to the same size as the fabric and ironed that to the wrong side. Then I ironed the cut out pieces to the right side. I proceeded to cut out the pieces and assemble them on the backing fabric, ironing as I went. Once it was complete I added some plain white fabric for the eyes.
Pooch Portrait in Fabric
5. I was very nervous about ruining it at this point with hand or machine embroidery (I hadn't decided which to do) so I photocopied the fabric jigsaw and doodled on the top of the photocopy in red (hence the demonic look of 5). I made a few copies and tried different doodles before deciding to hand embroider the pupils. I then took the whole thing over to my sewing machine and freehand embroidered over the top with the machine's dogs down.
Pooch Portrait in Fabric
And that's it! The hair is my favourite bit. I showed the finished portrait to my sister and ickle niece via Skype. My sister said "Wow...can I have one?" which I thought was pretty much the best reaction you can have to something you've made. Then my ickle niece (two years old this week!) kept asking to see it again and again during the call and I realised that actually that was the best reaction you can have!

Has anyone else made a fabric portrait? I'd love to see it if you have so please leave me a link in the comments. Thanks!


Thursday 14 May 2015

Thinking of Andy Warhol

Two very different occurrences took place this week and both led me to think of Andy Warhol - something I can't say I often do. But having begun to think of him I found myself combining everything I had heard about him into a big cloud and finding that is contained more than raindrop sized holes. I went so far as to download a biography of him just to check if the two instances I am going to relate were true - and by god, when I read that book I'll certainly come back and tell you. The Japanese have a word -  tsundoku - for buying books and then not reading them. I have a tendency to do that although even that I've tried to curb which links in nicely to my first instance. 


Instance One

During a random google I discovered there was an organisation in the southern part of San Francisco called Quilt Works which, as well as a shop, has a community outreach kind of function. In fact while I was there they were cutting up a bolt of fleece to make blankets for foster children arriving at the hospital with no possessions. Which is nice. The shop advertised oodles of fabric at cheap prices so, it being a single bus ride away, I went down there - thus once again arriving in one of the neighbourhoods Pooch keeps telling me I should never go to by myself and which I inevitably seem to arrive in by accident. It was very nice. 
Quilt Works, San Francisco
The prices were not quite as low as had been advertised but still I didn't see anything above $10 a yard and most was about $8.50. It was all quilting cottons and all nicely displayed. 
Quilt Works, San Francisco
I ended up doing three circuits of the shop before I picked anything up because, as I thought about it, I couldn't think of anything I needed. My stash isn't huge - it fits in boxes under my sewing table - but I have fat quarters or off cuts in most colours and had no plans for a big new project. However, I did see a cat fabric I liked and a few fat quarters caught my eye AND they had this nice polka dot fabric in FQ bundles and you know what I'm like for dots so I did bring some home with me. 
Untitled
Untitled
I got back from the shop about lunchtime. Made some lunch, did some tidying, did some sewing, watched some wrestling and some myseteries and pottered about and then it was dinner time. I was making dinner when I spotted the fabric I had bought, still in my bag. 
Spock\Monroe
Apparently (i.e. something I will check when/if I read the biography) when Andy Warhol died there were dozens of unopened shopping bags from designer clothes stores found in his apartment. I first heard/read/imagined this when I was at Art School in the late nineties and I've remembered it several times since then and it has always struck me as very sad, although sometimes I wonder whether it really is. Is it so wrong to get more enjoyment from the process than the final result? It's all up to the individual, but when you end up spending money on things you don't need, just to give you something to do, isn't that a bit sad? I suppose it depends on your financial position and also your storage space. If the task of finding a place for your stuff is stressing you, as I have found recently, then aimless acquisition is definitely a bad thing. If you're spending money that would be better spent on other things then that will inevitably stress you out too. If you acquire things you then have to get rid of, or that get spoilt by something like a flood or a fire, then that is a huge waste of time, space and money too. It is very handy to have a few supplies on hand for when inspiration strikes - but how many of us went way beyond that point some time ago and are still acquiring new things? 

In two minds about the whole issue, I unpacked the bag after dinner and assimilated it into my stash, much like the Borg assimilate new species into their collective. 


Instance Two

During the afternoon after my shopping trip I was chatting online with a friend who suggested I start vlogging. For those not in the know - this is like blogging but by video instead of in written posts. Vlogs tend to be on YouTube and there are now legions of "YouTube Artists" who are known purely for their online personas. In 1968 Andy Warhol wrote:

"In the future everyone will be world-famous for 15 minutes."

This is a quote I first used in a GCSE English class at the tender age of 14 and is something that has been much misuded and misquoted by practically everyone about people like Justin Bieber and that slutty one from that reality show - you know the one I mean. 

Many years ago I used to do a podcast and at its peak it would get 1000 downloads a week. I basically thought of that as my "15 minutes". Had I thought about making a video version? The quick answer was "um" and I did a bit more googling to see what the bright young things of today are doing. It turns out they're driving around in their cars, making videos of themselves checking their eyebrows in the rearview mirror before going to Walgreens for tweezers. The only craft one I could find was a woman showing what she'd bought in Michaels and it was a prime example of aimless acquisition since she clearly had nothing specific in mind for anything she had bought. Watching random examples was in many ways a rather depressing exercise. So, overall, I am probably not going to join the legions, but it has made me think again about turning my blog into more of a business. After all this is my tenth year of blogging (tenth!) during which time I've seen many other craft bloggers come and go.  

I'll be making plans over the next month or so about how to do this plus there surely must be a giveaway for a tenth anniversary! I'll be sure to update here as those plans develop. 


The Blue and White EPP Quilt - an Update

Way back in March 2014 my parents came to visit us in Tokyo. During that visit my Mum and I went to a fabric shop and picked out some fabrics for this quilt:
Mum's Quilt Diagram
It took a while but I finally made the few hundred hexagons and thousand or so diamonds and yesterday I finished assembling them into this.
Blue and White EPP quilt
One of the most remarkable things about it (for me, at least) is that it has come out as the right size. I just need to add a border (I'm thinking broderie anglais white with a plain blue underneath) and hand quilt the bugger - so give me another year and it should be done!

I designed the quilt to have three sections which would blend into each other. The tonal variation was something I added in later. First of all there was the bottom part - all hexagons.
Blue and White EPP quilt
Then the hexagons became separators between diamond stars.
Blue and White EPP quilt
And then finally, in the top part, the diamond stars became separated by other diamonds.
Blue and White EPP quilt
I didn't use any cut of fabric larger than a fat quarter so it is very scrappy. Maybe one day I'll take the time to work out how many different prints it contains.

For the quilting I am planning to quilt just inside the stars, hexagons and separating diamonds in a running stitch possibly using pearl cotton - although I'm not 100% on that yet. I *have* to have a sofa project for when I am watching WWE or whatever mystery show has currently got me hooked so it's nice that this quilt, having kept me company for most of the last year, will be sticking with me for another few months yet while that gets done.